800-832-7711

Acorn Onsite, Inc. - Serving septic system needs for California
  • Home
  • About Acorn
  • Locations Served
  • Acorn's Services
  • Engineering
  • Contact Us
  • Septic Basics
    • Septic Info & Basics
    • Regulations
    • Glossary
    • Septic Tanks
    • Leach Fields
    • Dispersal Field Types
  • Project Types
  • More
    • Home
    • About Acorn
    • Locations Served
    • Acorn's Services
    • Engineering
    • Contact Us
    • Septic Basics
      • Septic Info & Basics
      • Regulations
      • Glossary
      • Septic Tanks
      • Leach Fields
      • Dispersal Field Types
    • Project Types

800-832-7711


  • Home
  • About Acorn
  • Locations Served
  • Acorn's Services
  • Engineering
  • Contact Us
  • Septic Basics
  • Project Types

Septic Tank Risers Installation

Acorn Onsite, Inc. presents this guide to homeowner's as a basic guide to installing risers on an existing septic tank. Risers should be installed on a septic tank to allow easy access for routine maintenance. Scroll down to learn more. If any questions come up or to purchase materials call Acorn Onsite, Inc. at (925) 447-5200. 

Site Content

Septic tank riser recently installed in San Jose, CA

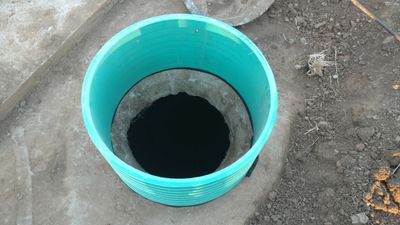
Step 1 Uncover both access ports

It is important to install a riser on both the inlet and outlet ports. This allows for easy pumping and no disturbance in you yard when it comes time to service the tank. 

Step 2 Check Inlet and Outlet Tees

Check to make sure the inlet and outlet tees are present and secure. If not contact Acorn Onsite, Inc. at (925) 447-5200 to discuss corrective actions. 

Step 3 Measure Riser Height

Measure the depth from the top of the tank to the ground surface to the nearest inch. Then add 2 inches. This is the total riser height needed. It is best to be above the ground surface about 2 inches. Bark and other loose material on the surface are not a good fit over a septic tank.

Once you have the riser height call us at (925) 447-5200 to purchase materials. We can cut the riser to whatever length you need.

Step 4 Clean Tank Surface

Clean the surface of the tank that the riser will be installed on. 

Step 5 Apply Butyl Rope to Riser and Place Riser on Tank

Stick the Butyl Rope onto the riser and place the riser onto the tank.

Step 6 Install Outlet Filter

It is best to install an outlet filter to have the cleanest effluent enter your leach field. 

Step 7 Fasten Covers and Apply Weight

Fasten the riser covers with stainless steel bolt and apply a weight to the cover to allow the butyl rope to adhere.


Step 8 Backfill and You're Done!

Backfill the risers, make sure to pack soil around the risers. Allow the lid to be just above the ground surface.


Now your septic tank has easy access to pump and properly maintain

Next time your septic tank is due for pumping, there is no need for destructive digging to uncover the septic tank covers.


Acorn Onsite, Inc. provides all the materials detailed in this guide. To purchase or if you have any questions please call us at (925) 447-5200. We are happy to explain any details about septic tank risers or septic systems in general. 

Acorn Onsite, Inc. is a Civil Engineering firm specializing in septic systems. We serve all counties throughout Northern California and Central California.

Acorn Onsite, Inc. 925-447-5200 or 800-832-7711

  • Acorn Blog
  • Upload

Cookie Policy

This website uses cookies. By continuing to use this site, you accept our use of cookies.

DeclineAccept & Close